How to Test if a Coax Cable is Live with a Multimeter
Given their importance, it’s essential to ensure coax cables are functioning correctly. One key aspect of this is determining whether a coax cable is “live” – that is, whether it’s carrying an electrical signal. This is where a multimeter comes in handy. A multimeter is a versatile tool that can measure various electrical properties, making it perfect for testing coax cables.
In this article, we’ll walk you through the process of using a multimeter to test if a coax cable is live. Whether you’re a DIY enthusiast, a budding technician, or simply curious about how your home network operates, this knowledge will prove invaluable.
How Multimeter Works
Before we dive into testing coax cables, let’s familiarize ourselves with the multimeter. This handheld device is a combination of several measurement tools in one:
- Voltmeter: Measures electrical potential difference (voltage)
- Ammeter: Measures electrical current
- Ohmmeter: Measures electrical resistance
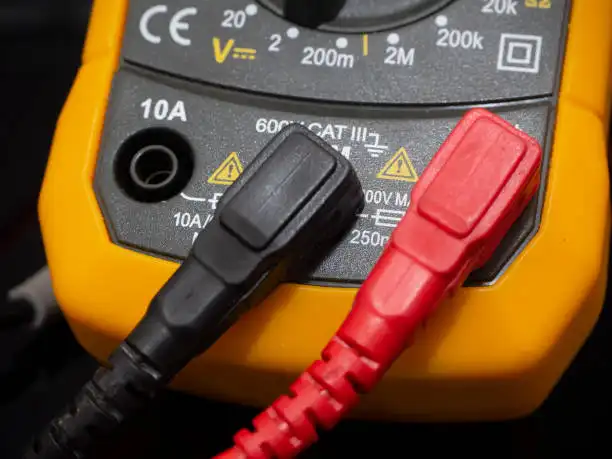
For our purposes of testing a coax cable, we’ll primarily use the voltmeter function. Most modern multimeters are digital, providing easy-to-read numerical displays. They typically have two probes – one red (positive) and one black (negative or ground) – which you’ll use to connect to the cable you’re testing.
When testing coax cables, you’ll want to set your multimeter to measure AC (Alternating Current) voltage, as this is the type of signal typically carried by coax cables in most applications.
Required Tools and Materials
To test a coax cable, you’ll need:
- A digital multimeter
- The coax cable you want to test
- Coax cable adapters (if your multimeter probes don’t fit directly into the cable connectors)
- Wire strippers (optional, for exposing cable ends if necessary)
Ensure your multimeter is in good working condition with sufficiently charged batteries before you begin.
Preparing for the Test
Now that we have our tools ready and safety measures in place, let’s prepare for the test:
- Disconnect the coax cable from any devices it might be connected to. This includes TVs, cable boxes, modems, or antennas.
- If your cable has standard F-type connectors (the screw-on type commonly used for TV connections), you should be able to access the center conductor easily. If not, you may need to carefully strip away a small portion of the outer jacket and shield to expose the inner conductor and shield separately.
- If your multimeter probes are too large to fit into the coax connector, you may need to use adapters. These can usually be found at electronics stores.
- Set your multimeter to AC voltage mode. Most coax signals in home applications operate between 5 and 100 volts AC, so set your meter to a range that covers this (typically the 200V AC setting will work well).
Testing Procedures
Testing for a Live Signal
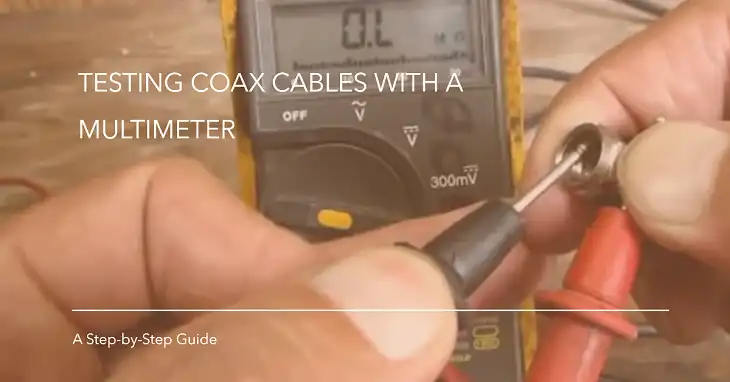
- Insert the red probe of your multimeter into the center of the coax connector, making contact with the center conductor.
- Touch the black probe to the outer metal shell of the connector, which connects to the cable’s shield.
- Observe the multimeter display. If the cable is carrying a live signal, you should see a voltage reading. In most home cable TV or internet setups, this could be anywhere from about 5 to 100 volts AC.
- If you see a voltage reading, congratulations! Your coax cable is live. The exact voltage can vary depending on the signal strength and the specific application, but any consistent, non-zero reading indicates an active signal.
- If you see zero or a very low voltage (less than 1 volt), the cable may not be live. However, don’t jump to conclusions just yet – we’ll cover troubleshooting in a moment.
Testing for Continuity
While not directly related to testing if a cable is live, checking continuity can help ensure your cable isn’t damaged:
- Set your multimeter to continuity mode (often indicated by a sound wave or diode symbol).
- Touch one probe to the center conductor at one end of the cable, and the other probe to the center conductor at the other end.
- You should hear a beep or see a very low resistance reading (close to 0 ohms) if the cable has good continuity.
- Repeat this process for the shield (outer conductor) of the cable.
Testing for Shorts
A short circuit in your coax cable can prevent it from carrying a signal properly:
- Set your multimeter to resistance mode (Ω symbol).
- Touch one probe to the center conductor and the other to the shield.
- You should see a very high resistance or “OL” (over limit) reading. If you see a low resistance, this indicates a short between the center conductor and shield, which is a problem.
Interpreting Test Results
Here’s a quick reference for interpreting your test results:
| Test Type | Good Result | Potential Problem |
| Live Signal | 5-100V AC | 0V or <1V AC |
| Continuity | Near 0Ω or beep | High resistance or no beep |
| Shorts | Very high resistance or OL | Low resistance |
Remember, these are general guidelines. Specific voltage levels can vary depending on your cable system and application.
Troubleshooting Common Coax Connection Issues
If your tests indicate a problem, here are some common issues and their potential causes:
- No signal detected: The cable may not be connected to an active source, or there might be a break in the cable.
- Weak signal (very low voltage): This could indicate signal loss due to a long cable run, poor connections, or damage to the cable.
- Fluctuating readings: This might suggest intermittent connectivity issues, possibly due to a loose connection or partial damage to the cable.
- Short circuit: If your continuity test shows a connection between the center conductor and shield, your cable likely has internal damage and may need to be replaced.
Alternative Testing Methods
While a multimeter is a versatile tool, there are other methods to test coax cables:
- Cable testers: Specialized tools designed specifically for testing coax cables. They can often provide more detailed information about signal quality.
- Signal generators: These can be used in conjunction with a multimeter to test signal transmission through the cable.
- Cable tracing: Tools that can help you trace the path of a coax cable through walls or under floors, which can be helpful in identifying the source of issues in complex installations.
Wrapping Up
Testing a coax cable with a multimeter is a valuable skill that can help you maintain your home entertainment system, troubleshoot connectivity issues, and even save money on unnecessary service calls. By understanding the basics of how these cables work and how to test them, you’re better equipped to keep your systems running smoothly.
Remember, while these tests can identify many common issues, some problems may require professional diagnosis and repair. If you’re ever in doubt, don’t hesitate to consult with a qualified technician.