How to Setup Rockspace WiFi Extender?
As an installer, I know how frustrating it can be to deal with weak WiFi signals. That’s why I’m excited to share this quick guide on setting up the Rockspace WiFi extender. With just a few steps, you’ll be able to boost your wireless coverage and say goodbye to those annoying dead zones. Whether you prefer the WPS method or manual setup, I’ll walk you through the process and even share some bonus tips for optimal placement. Let’s get started!
Setup Rockspace WiFi Extender By Using WPS
The WPS (Wi-Fi Protected Setup) method is a super convenient way to connect your Rockspace extender to your existing wireless network without any fuss. Here’s how you can do it in a few simple steps:
Locate the WPS buttons on both your router and the Rockspace extender. These buttons are usually marked with a small WPS logo or the letters “WPS.”
Press and hold the WPS button on your router for a few seconds, as instructed in your router’s manual. This will initiate the WPS connection process.
Within 2 minutes, locate the WPS button on your Rockspace extender and press it. The extender’s WPS light should start blinking, indicating that it’s ready to connect.
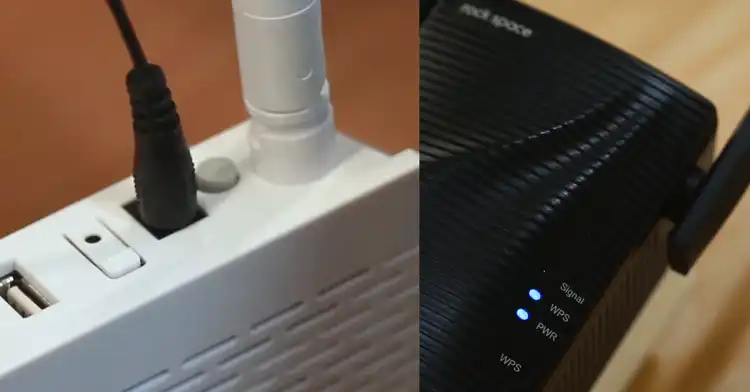
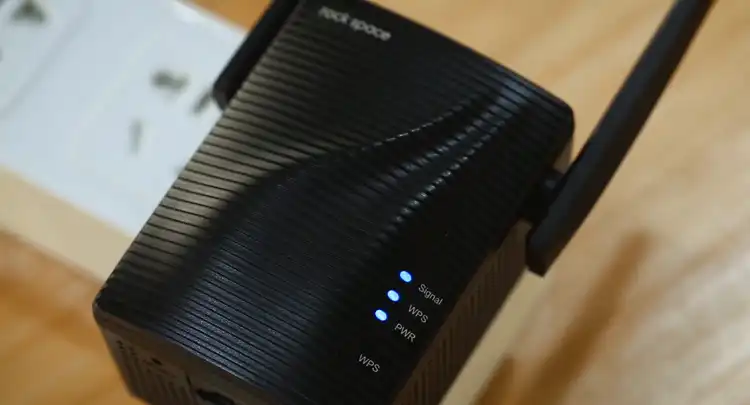
Sit back and relax! After a short waiting period, the extender’s signal and WPS LED should turn a solid blue color, confirming that it has successfully connected to your wireless network.
And just like that, you’re all set to enjoy extended WiFi coverage throughout your home or office!
Setup Rockspace WiFi Extender without WPS
If you prefer not to use the WPS method or if it’s not working for you, no worries! You can easily set up your Rockspace WiFi extender manually. Here’s how:
- Start by choosing a location that’s roughly halfway between your router and the area with a weak WiFi signal. Plug the extender into a power outlet and wait for it to power up.
- On your computer or smartphone, search for available WiFi networks and connect to the one named rockspace_EXT (or something similar, depending on your extender’s model). If you’re using a smartphone, make sure to disable your mobile data connection.
- Once you’re connected to the extender’s network, open a web browser and enter http://re.rockspace.local or http://192.168.0.254 in the address bar. This should open the extender’s setup page.
- You’ll be prompted to create an admin password for the extender. Choose a secure password and click Next.
- On the next page, you’ll see a list of available WiFi networks. Select the one you want to extend (your home or office network).
- Enter the password for the chosen WiFi network when prompted.
- Wait for the setup process to complete. The page should display a message saying Extended successfully! once the setup is done.
If you want a way more simplified option to set up the range extender, then you can use an ethernet cable to connect your router and rockspace WiFi range extender.
Your Rockspace extender is now connected to your main WiFi network, providing you with extended coverage throughout your space.
Bonus Tips – Proper Placement of Rockspace WiFi Extender for Better Connection
While setting up your Rockspace WiFi extender is essential, its placement can also significantly impact its performance. Here are some tips to ensure optimal placement for the best possible connection:
➕ Place the extender roughly halfway between your router and the area with poor WiFi coverage. This allows the extender to receive a strong signal from your router while also providing ample coverage to the dead zone.
➕ Avoid placing the extender near obstructions like walls, floors, or metal furniture, as these can interfere with WiFi signals.
➕ If you’re using the extender in a single-story building, tilt the lower antennas upward to help distribute the signal more effectively throughout the space.
➕ On the other hand, if you’re using the extender in a multi-story setup, position the lower antennas downward to provide better coverage to the lower levels.
➕ Consider elevating the extender by placing it on a shelf or mounting it on a wall, rather than tucking it away in a corner or underneath furniture.
➕ Don’t be afraid to experiment with different locations until you find the sweet spot with the strongest and most consistent signal.
➕ Regularly check for firmware updates from the manufacturer and install them to ensure your extender is running at peak performance.
By following these simple tips, you’ll be able to maximize the benefits of your Rockspace WiFi extender and enjoy seamless, uninterrupted wireless connectivity throughout your home or office.
Wrapping Up
There you have it, folks! With the Rockspace WiFi extender up and running, you can now enjoy seamless wireless connectivity throughout your space. Remember, the key to getting the most out of your extender is proper placement, so don’t hesitate to experiment and follow those bonus tips. If you ever run into any issues or have additional questions, feel free to reach out. I’m always happy to help!