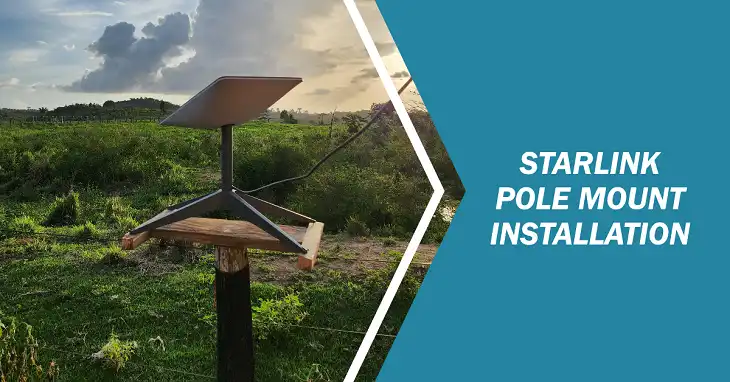
Everything You Need to Know About Starlink Pole Mount Installation
Pole mounting your Starlink dish offers several advantages over other installation methods. It provides flexibility in positioning, allows for better signal reception, and can help overcome obstacles that might interfere with your connection. Whether you’re in a rural area with limited options or simply looking to optimize your Starlink experience, a pole mount installation could be the perfect solution.
Equipment Checklist: What You’ll Need
A successful installation starts with having all the necessary equipment on hand. Here’s a comprehensive list of what you’ll need:
| Category | Items |
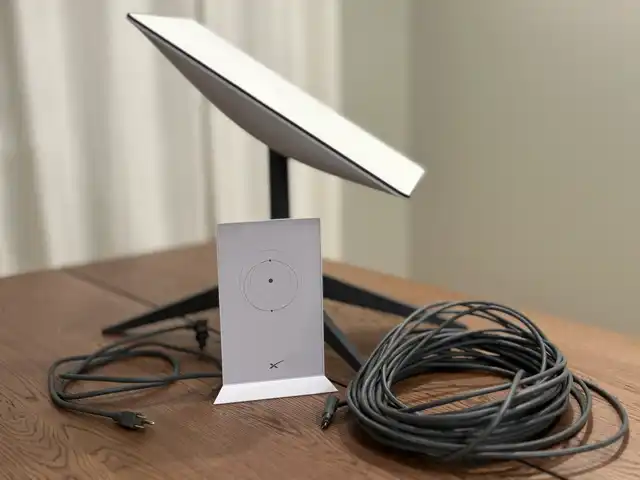
| Starlink Equipment | Starlink dish, router, power supply |
| Mounting Hardware | Pole mount kit, lag bolts, washers |
| Tools | Wrench set, socket set, level, drill |
| Safety Gear | As listed in the safety section |
| Miscellaneous | Cable ties, weatherproof tape, silicone sealant |
Choosing the Perfect Spot For Starlink Pole Mount
The success of your Starlink connection heavily depends on the location of your dish. Here’s what to consider:
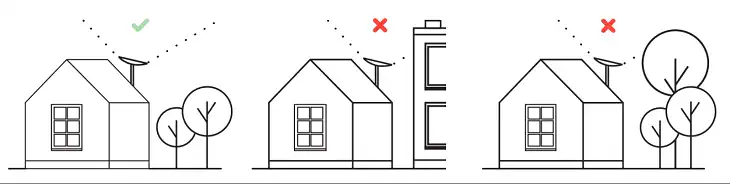
Clear Sky View
Your Starlink dish needs a clear view of the northern sky (in the northern hemisphere) or southern sky (in the southern hemisphere). Use the Starlink app’s obstruction checker to find the ideal spot.
Proximity to Power
While you can run cables a considerable distance, it’s best to minimize the length to reduce signal loss and installation complexity.
Pole Selection
Choose a pole that’s sturdy enough to withstand local weather conditions. Options include:
- Galvanized steel: Durable and weather-resistant
- Aluminum: Lightweight and corrosion-resistant
- Fiberglass: Non-conductive and suitable for areas with frequent lightning
Aim for a pole height of 5-7 feet above ground level, ensuring it’s tall enough to clear nearby obstructions.
Step-by-Step Installation Process for Starlink Pole Mount
Now that we’ve covered the preliminaries, let’s dive into the installation process.
1. Prepare the Ground
If you’re installing a new pole, you’ll need to prepare the ground. For most installations, a concrete footing is recommended.
- Dig a hole about 2 feet deep and 1 foot in diameter.
- Mix concrete according to manufacturer instructions.
- Pour the concrete into the hole, leaving space at the top for the pole.
- Allow the concrete to cure for at least 24 hours before proceeding.
2. Mount the Pole
Once the concrete has cured:
- Place the pole into the hole.
- Use a level to ensure the pole is perfectly vertical.
- Fill the remaining space with concrete or soil, tamping it down firmly.
3. Attach the Starlink Mount
- Slide the Starlink mount onto the pole.
- Adjust the height as needed.
- Tighten the mounting bolts securely.
4. Install the Starlink Dish
- Carefully unpack the Starlink dish.
- Attach the dish to the mount, ensuring it’s securely fastened.
- Gently rotate the dish to its vertical position.
5. Cable Management
- Run the cable from the dish down the pole.
- Secure the cable to the pole using UV-resistant zip ties every 12-18 inches.
- Leave some slack at the top to allow for dish movement.
6. Connect to Power and Network
- Route the cable to your home, burying it if possible to protect from damage.
- Connect the cable to the Starlink router and power supply indoors.
- Plug in the power supply and wait for the system to boot up.
Optimizing Your Starlink Connection
After installation, it’s time to fine-tune your setup for the best possible performance.
Dish Orientation
The Starlink dish is designed to self-orient, but you can help by ensuring it has a clear view of the sky. Monitor the Starlink app for any obstruction warnings and adjust if necessary.
Signal Strength Monitoring
Use the Starlink app to monitor your signal strength and connection quality. If you notice persistent issues, you may need to adjust the dish position or address any new obstructions.
Is Pole Mounting for Starlink Worth It?
While pole mounting involves some upfront costs, it can provide long-term benefits. Here’s a breakdown:
| Expense | Estimated Cost |
| Pole and concrete | $50 – $150 |
| Mounting hardware | $100 – $200 |
| Tools (if needed) | $50 – $150 |
| Professional installation (optional) | $200 – $500 |
Compared to potential alternatives like roof mounting or frequent repositioning, pole mounting can offer better performance and less hassle over time, potentially justifying the initial investment.
Bottom Line
A well-executed pole mount installation can significantly enhance your Starlink internet experience. By following this guide, you’ll be well-equipped to set up a stable, high-performing Starlink system that can withstand the elements and provide reliable high-speed internet for years to come.